

How to Temporarily Stop a Roof Leak (4-Step Emergency Guide)

Seeing water drip from your ceiling is terrifying. But if you are asking what to do when your roof starts leaking. The most important thing is to stay calm and act fast. Whether you need a temporary fix for a leaking roof inside or an emergency tarping guide. These steps will help you minimize water damage right now.
But acting fast can save you thousands of dollars in structural water damage.
While a permanent repair always requires a professional, there are effective ways to temporarily stop a roof leak to protect your home until the rain stops. Follow these 4 steps to manage the water inside and patch the leak outside.
⚠️ Safety Warning: Never climb on a roof while it is raining, icy, or wet. No repair is worth a serious injury. If the leak is uncontrollable, check our Emergency Roof Leak Guide to see if you need professional tarping services immediately.
Emergency Supply List: What You Need
For Inside: Buckets, trash cans, towels, a screwdriver, and a flashlight.
For Outside (Once Dry): A sheet of metal flashing (or spare shingle), roofing cement, or a heavy-duty tarp.
Step 1: Relieve Ceiling Pressure (Inside)
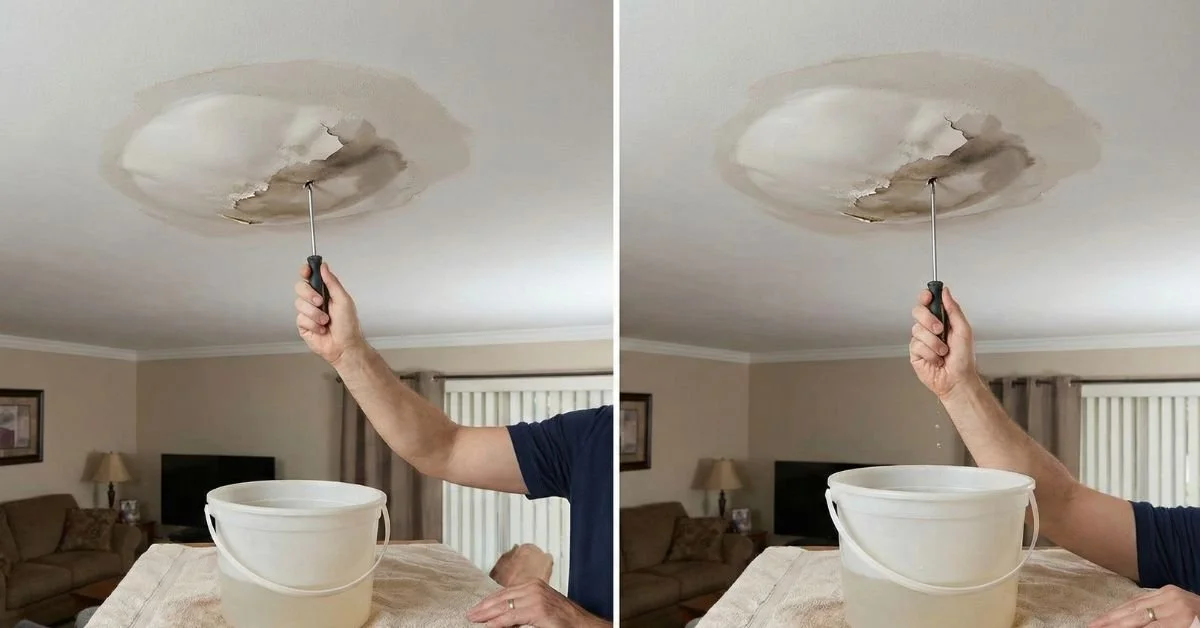
Do this immediately to prevent ceiling collapse.
If you see a "bulge" or sagging spot in your drywall ceiling, it is holding gallons of water. If left alone, the weight will cause the entire ceiling to collapse.
The Fix: Place a large bucket underneath the bulge. Take a screwdriver and poke a small hole in the center of the wet spot.
Why? This creates a controlled stream into your bucket, relieving the pressure and saving your drywall from crashing down.
Step 2: Locate the Entry Point (Attic)
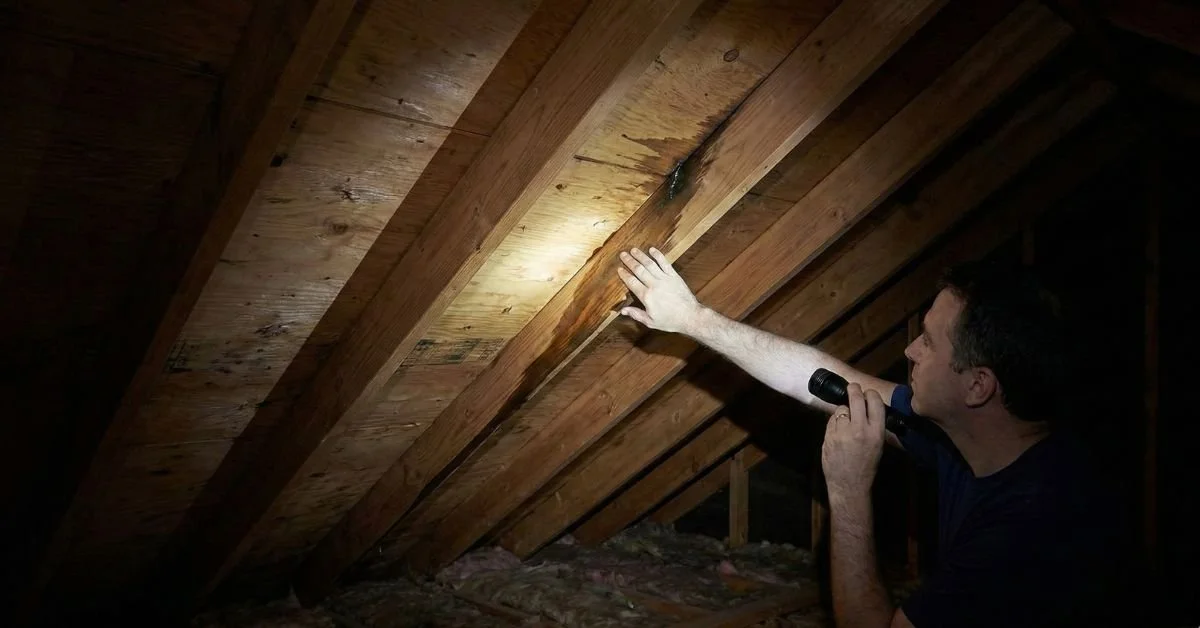
You cannot fix the leak until you find where it enters the house.
Water rarely drips straight down. It often enters through a missing shingle, runs 10 feet down a rafter, and drips onto your insulation.
Go to the attic: Look for wet insulation, dark stains on the underside of the wood decking, or visible daylight.
Trace the trail: Follow the water trail up the rafter to the highest wet point. That is your true leak source.
Step 3: The "String Trick" Diverter (Attic)

Use this if the water is running down a rafter and splashing everywhere.
If you can't stop the water coming in, you can control where it goes.
The Fix: Nail a piece of string or wire to the wet spot on the rafter. Place the other end of the string into a bucket below.
Why? Water naturally follows the path of least resistance (surface tension). It will run down the string into the bucket rather than splashing onto your insulation and floor.
Step 4: The "Shingle Slide" Patch (Outside)
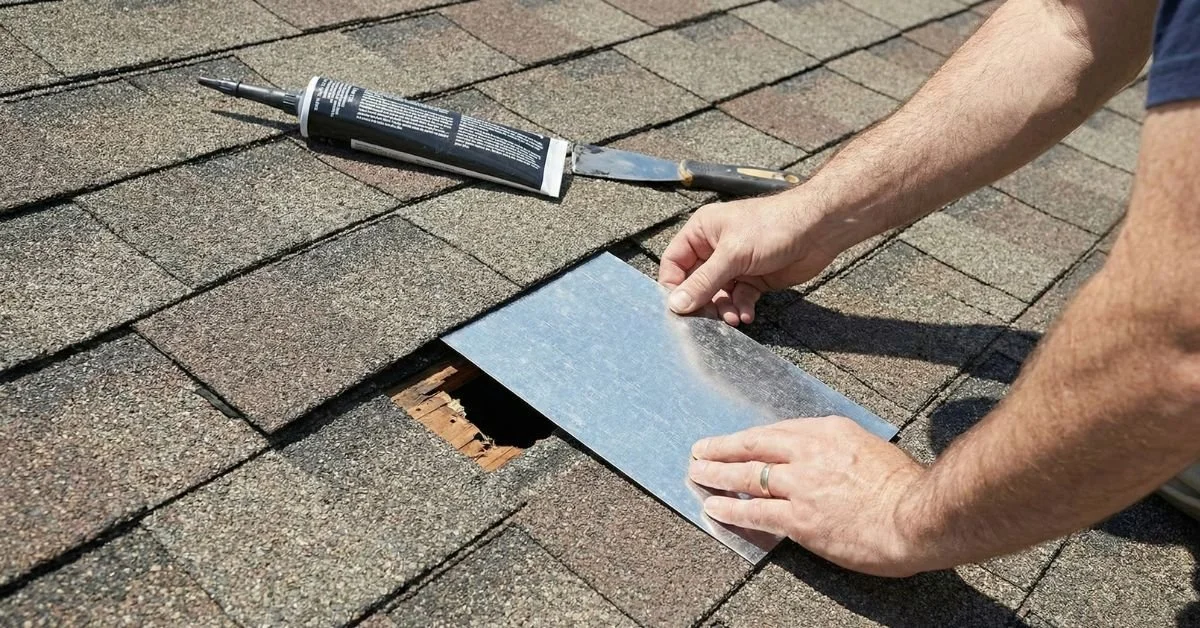
Perform this step ONLY when the rain has stopped and the roof is dry.
For smaller leaks (like a nail pop or small hole), you don't always need a massive tarp. You can use the "Shingle Slide" method.
The Fix: Gently pry up the shingles directly above the leak location. Slide a piece of galvanized sheet metal or a new shingle underneath the existing one, covering the hole.
Seal it: Apply a small amount of roof leak sealant (roofing cement) to hold it in place.
(Note: If the damage is extensive, such as a tree limb puncture, skip this and install a heavy-duty tarp anchored with 2x4 boards.)
3 Things You Should NEVER Use to Patch a Roof
We often see homeowners use "quick fixes" that actually make the repair more expensive later.
Silicone Caulk: Standard window caulk won't stick to asphalt shingles, especially when wet. It will peel off in days.
Duct Tape: It might work for 24 hours, but the sun's UV rays will disintegrate the adhesive, leaving a sticky mess.
Spray Foam: Expanding foam is not waterproof and looks terrible. It forces us to cut out large sections of your roof to fix it properly.
Is It Time for a Professional Repair?
A patch is a temporary "band-aid." It generally lasts 30 to 90 days. If you leave it too long, UV rays will degrade the material, and moisture will rot your decking.
Curious about the cost?
A permanent professional fix is often more affordable than homeowners expect. A standard pipe boot repair is typically under $400.
View our 2026 Roof Repair Cost Guide Here.
Need help in St. Louis, Arnold, or Fenton?
If you aren't comfortable climbing a ladder, don't risk it. We offer emergency tarping and repair services.